This post belongs to the Phoenix & Elm landing page series.
- Bootstrapping the project and the basic API functionality to save our first leads
- Building the landing page UI and the basic Elm subscription form
- Adding Google reCAPTCHA support to avoid spambots
In the previous part of the series we created the project for our brand new landing page, we generated the migration for the leads table, we implemented the logic for saving them into the database, and we also added some tests to ensure that everything was working fine. Now we can focus on the front-end side of the project, which consists of a Phoenix template, an Elm form, and some Sass love. Let’s do this!
A little bit of clean up
Before going any further, let’s do a clean up emptying or removing some of the files generated by Phoenix. These changes include:
-
Removing
assets/css/phoenix.css. -
Removing
assets/js/socket.jsas we are not using sockets this time. -
Removing
assets/static/images/phoenix.png.
Apart from removing these extra files that we do not need anymore, we are also going to edit some of the existing ones. First of all, let’s update the main layout template and remove all the default Phoenix HTML elements:
# lib/landing_page_web/templates/layout/app.html.eex

<!DOCTYPE html>
<html lang="en">
  <head>
    <meta charset="utf-8">
    <meta http-equiv="X-UA-Compatible" content="IE=edge">
    <meta name="viewport" content="width=device-width, initial-scale=1">
    <meta name="description" content="">
    <meta name="author" content="">

    <title>Hello Landing Page!</title>
    <link rel="stylesheet" href="<%= static_path(@conn, "/css/app.css") %>">
  </head>

  <body class="landing-page">
    <%= render(@view_module, @view_template, assigns) %>
    <script src="<%= static_path(@conn, "/js/app.js") %>"></script>
  </body>
</html>
Next, we have to edit the index.html template to add the basic structure
of the landing page:
# lib/landing_page_web/templates/page/index.html.eex

<div class="main-wrapper">
  <div class="left">
    <div class="hero">
      <h1 class="title">Phoenix & Elm landing page</h1>
      <p class="subtitle">
        Real use case of building a landing page using <strong>Phoenix</strong> and <strong>Elm</strong>,
        following some common patterns and best practices.
      </p>
    </div>
    <div class="scroll-to">
      <a class="icon">
        <i class="fa fa-chevron-down"></i>
      </a>
    </div>
  </div>
  <div class="right" id="subscribe_form">
    <section class="section">
      <div class="container is-fluid">
        <div id="form_container"></div>
      </div>
    </section>
  </div>
</div>
Having deleted all the extra files and the layout template ready, we are in a good position to add some styling.
Adding styles with Sass and Bulma
I have started using Bulma like a month ago, and I love the results so far. It is a pretty slick looking CSS framework, based on flexbox and which is very easy to customize using Sass. Let’s install everything we need to use Bulma and Sass with Brunch:
$ cd assets
$ npm install node-sass sass-brunch --save-dev
...
...
$ npm install bulma normalize-scss --save
...
...
After installing the needed modules, we have to edit Brunch’s configuration file to add support for Sass:
// assets/brunch-config.js

exports.config = {
  // See http://brunch.io/#documentation for docs.
  // ...

  // Configure your plugins
  plugins: {
    // ...

    sass: {
      mode: 'native',
      sourceMapEmbed: true,
      options: {
        includePaths: [
          'node_modules/normalize-scss/sass/',
          'node_modules/bulma/',
        ],
      },
    },
  },

//...
}
Another tool that I often use to organize my styles files is css-burrito, which generates a very convenient structure of Sass files to help you have a well and organized Sass architecture based on modules. I am not going to dive deeper into the implementation details, but here you can find the resulting files. After adding the style files, and restarting the Phoenix server, we can visit http://localhost:4000 and see the following:
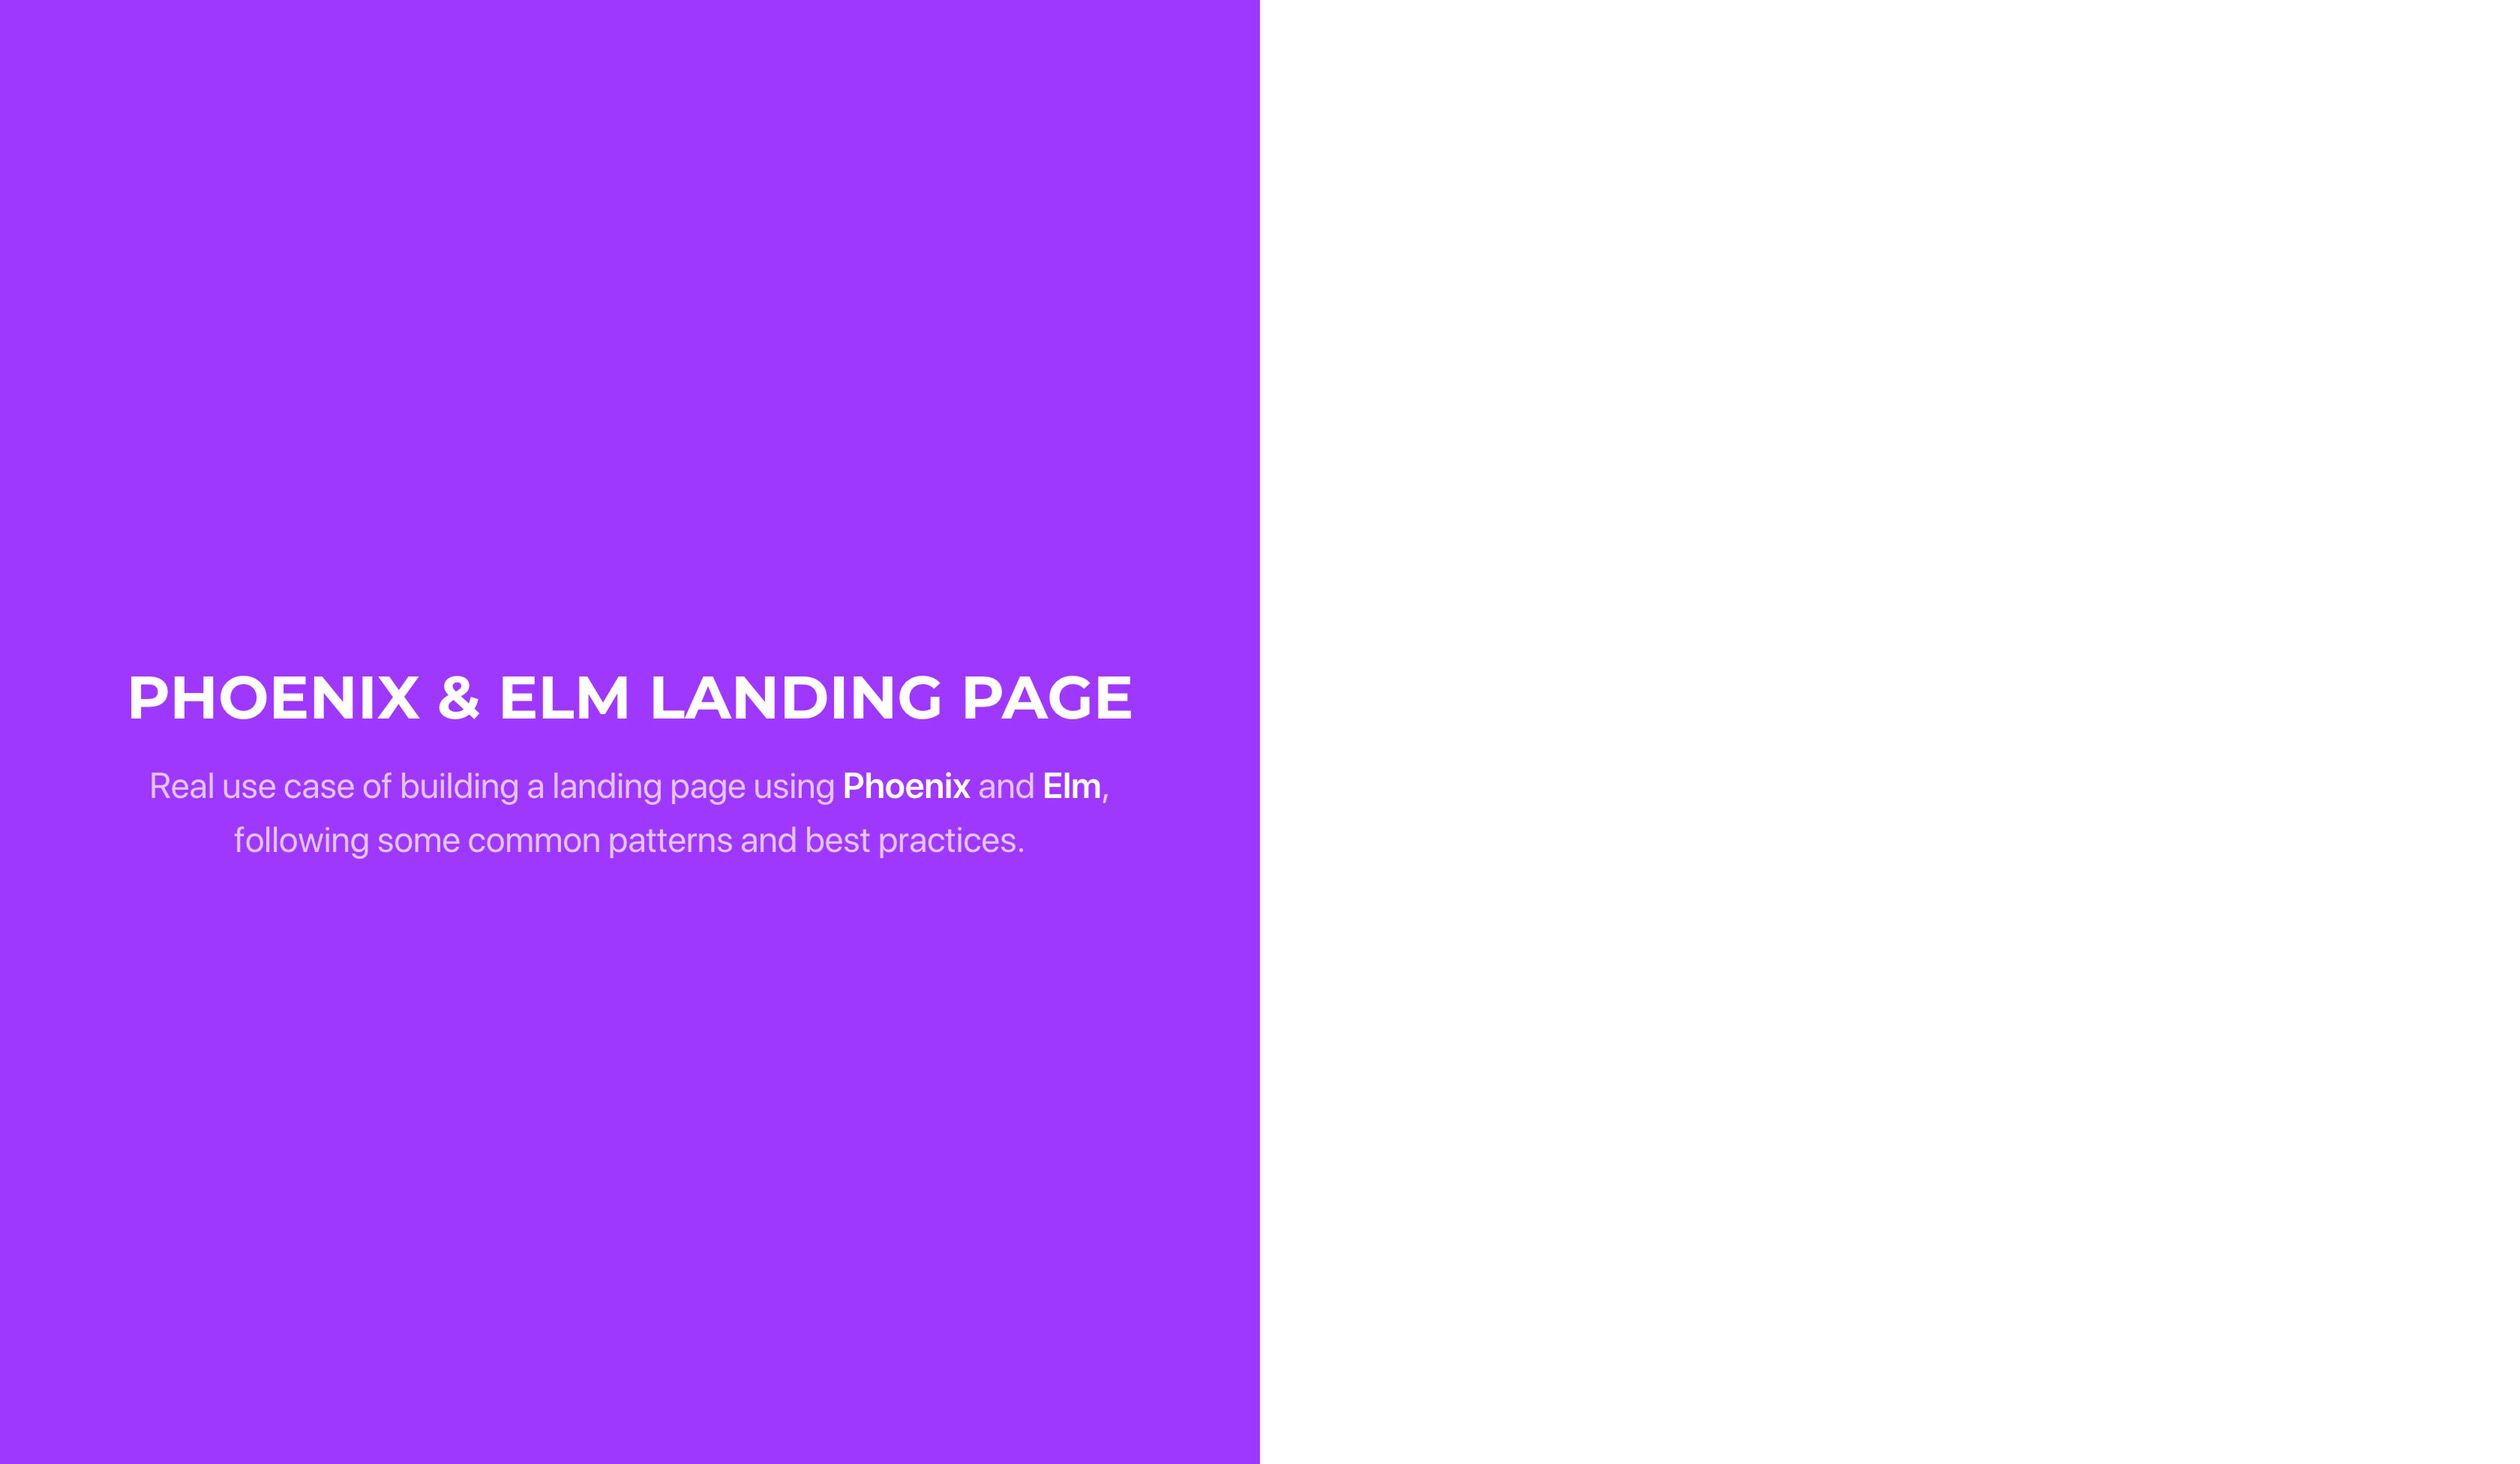
Not looking bad at all! However, what about the subscription form?
Adding Elm support
Adding Elm to the project is pretty straightforward. Before going any further, make sure you visit Elm’s official site and follow the install instructions for your current platform. Once you have sorted that out, let’s continue by adding Elm, and its Brunch support to the project:
$ cd assets
$ mkdir elm
$ cd elm
$ elm package install elm-lang/html -y
.
..
...
The last command installs the basic Elm packages and generates the initial file structure and configuration file that we need to update to make it look like the following:
// assets/elm/elm-package.json

{
  "version": "1.0.0",
  "summary": "Repo for my Phoenix and Elm landing page series",
  "repository": "https://github.com/bigardone/phoenix-and-elm-landing-page.git",
  "license": "BSD3",
  "source-directories": ["src"],
  "exposed-modules": [],
  "dependencies": {
    "elm-lang/core": "5.1.1 <= v < 6.0.0",
    "elm-lang/html": "2.0.0 <= v < 3.0.0"
  },
  "elm-version": "0.18.0 <= v < 0.19.0"
}
We also need to install Brunch’s Elm package:
$ cd assets
$ npm install --save-dev elm-brunch
When working with Elm, something that I usually do is to create an src
folder inside assets/elm where I put there all my Elm source files. The
reason for this is that I sometimes install third-party libraries, and
I like to separate them from my source files, so I place them in an
assets/elm/vendor folder. Therefore, don’t forget to change the
"source-directories": ["src"] line, otherwise your Elm files are not going
to compile at all. We still have to make Brunch detect and build Elm
files, so let’s edit the Brunch configuration file once more:
// assets/brunch-config.js

exports.config = {
  // See http://brunch.io/#documentation for docs.
  // ...

  // Phoenix paths configuration
  paths: {
    // Dependencies and current project directories to watch
    watched: ['static', 'css', 'js', 'vendor', 'elm'],
    // ...
  },

  // Configure your plugins
  plugins: {
    // ...

    elmBrunch: {
      mainModules: ['src/Main.elm'],
      elmFolder: 'elm',
      outputFolder: '../js/elm',
      makeParameters: ['--warn', '--debug'],
    },
  },

//...
}
To test that everything is working fine, let’s create simple main Elm module:
-- assets/elm/src/Main.elm

module Main exposing (main)

import Html exposing (Html)


main : Html msg
main =
    Html.text "Hello, Elm"
Lastly, we have to embed the generated javascript by Elm in the
index.html template, so let’s edit the main app.js file:
// assets/js/app.js

import Elm from './elm/main';

const elmContainer = document.querySelector('#form_container');

if (elmContainer) {
  const app = Elm.Main.embed(elmContainer);
}
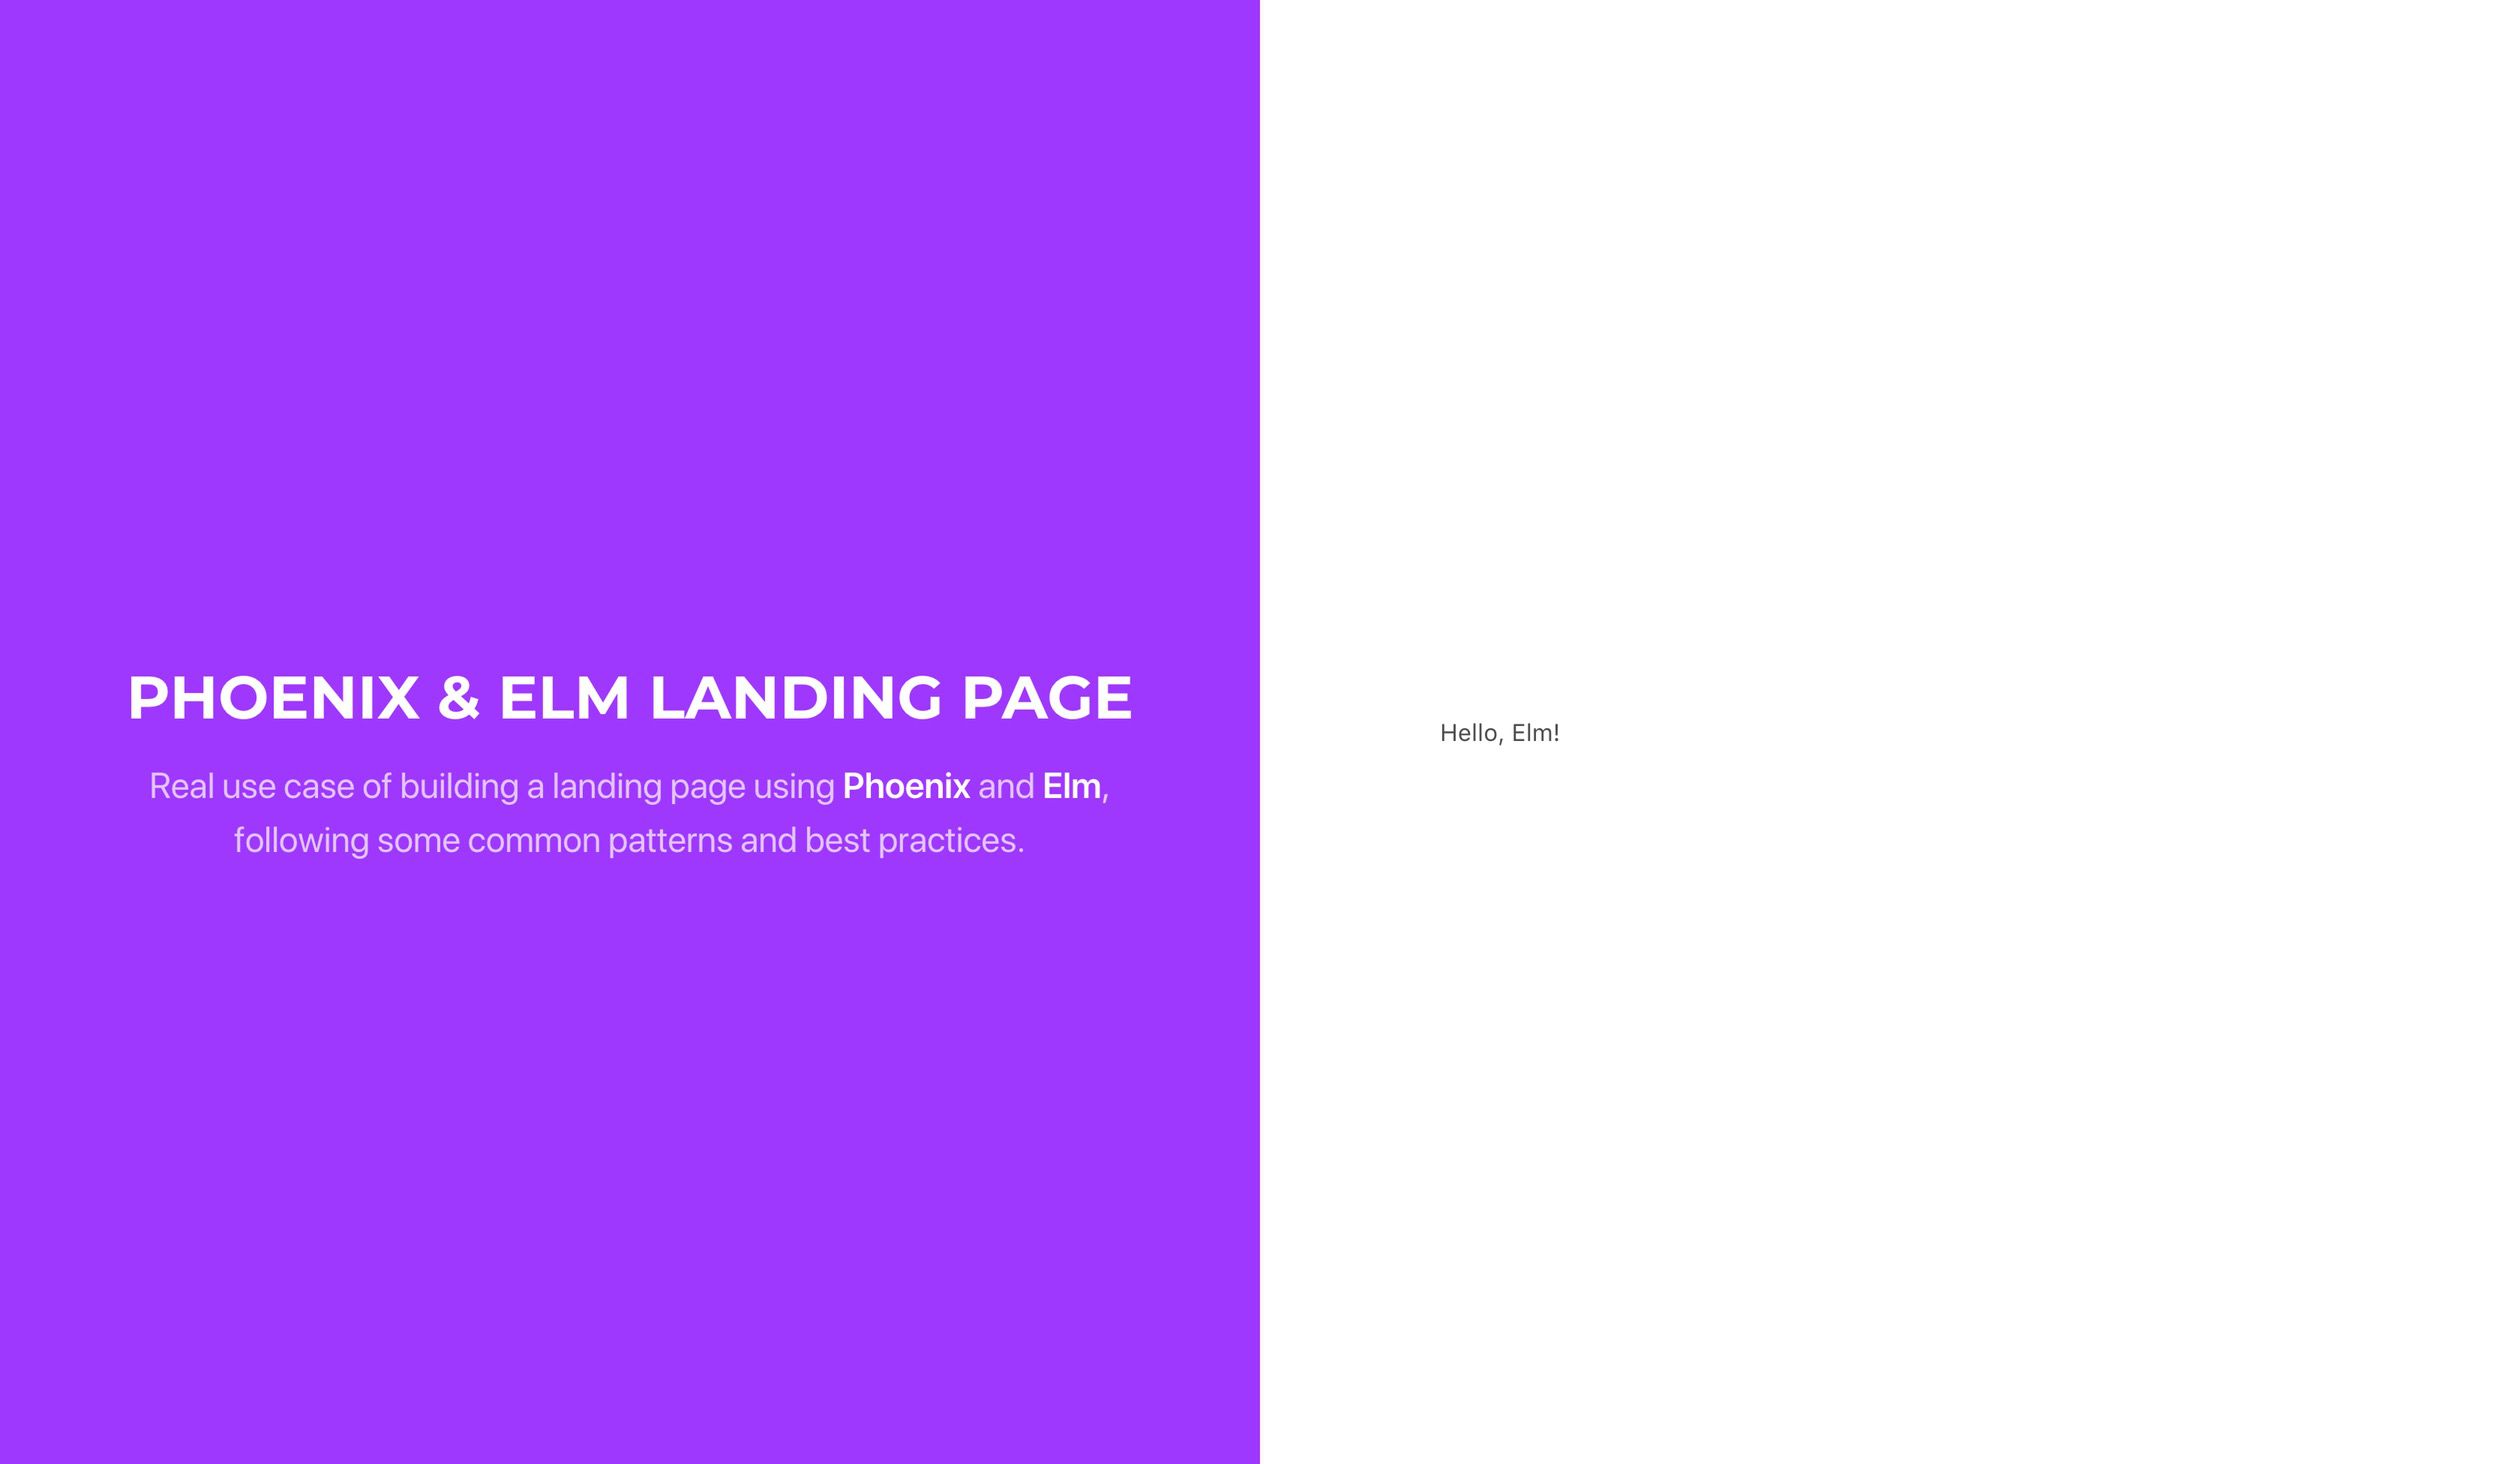
After Brunch finishes compiling the assets, we can see the Hello, Elm! message on the right section of the landing page, yay!
The subscription form
The subscription form we need consists of two fields, one for the lead’s full name and another one for the email. Knowing this, let’s start by defining any Elm application core element, the model:
-- assets/elm/src/Model.elm

module Model exposing (..)

import Dict exposing (Dict)


type alias FormFields =
    { fullName : String
    , email : String
    }


type alias ValidationErrors =
    Dict String (List String)


type SubscribeForm
    = Editing FormFields
    | Saving FormFields
    | Invalid FormFields ValidationErrors
    | Errored FormFields String
    | Success


type alias Model =
    { subscribeForm : SubscribeForm }


extractFormFields : SubscribeForm -> FormFields
extractFormFields subscribeForm =
    case subscribeForm of
        Editing ff ->
            ff

        Saving ff ->
            ff

        Invalid ff _ ->
            ff

        Errored ff _ ->
            ff

        Success ->
            emptyFormFields


emptyFormFields : FormFields
emptyFormFields =
    { fullName = ""
    , email = ""
    }


extractValidationErrors : SubscribeForm -> ValidationErrors
extractValidationErrors subscribeForm =
    case subscribeForm of
        Invalid _ validationErrors ->
            validationErrors

        _ ->
            emptyValidationErrors


emptyValidationErrors : ValidationErrors
emptyValidationErrors =
    Dict.empty


initialModel : Model
initialModel =
    { subscribeForm = Editing emptyFormFields }
Model consists of a record with a subscribeForm key, which is
a union type representing the form’s current state which can be one of
the following:
-
Editingis the initial state when the user is typing on its controls. -
Savingis when the user submits the form, and the Http request with the data is sent to the backend. -
Invalidmeans that there are validation errors or something went wrong while saving the data. -
Erroredfor the cases where there is an error not related to validation. -
Successrepresents that everything went fine, and the lead’s data has been saved into the database.
Depending on the form’s current state, SubscribeForm might have
a FormFields record with the current values inserted by the user, and
a ValidationErrors type, which consists of a Dict of validation errors by
field, or a String containing an error message, which is the case of
Errored. But why are we defining the model like this? If you are new to
Elm, and not very familiar with union types, you might have probably
defined the model something like:
type Status
    = Editing
    | Saving
    | Invalid
    | Errored
    | Success

type alias Model =
    { formFields : FormFields
    , validationErrors : Dict String (List String)
    , error: String
    , status : Status
    }
This approach is completely fine, until you realize that it can drive to
inconsistent states, like having a Success state with a nonempty Dict of
validationErrors or with an error message string, and you have to make an
extra effort to prevent the impossible states, or states that don’t make
sense at all. Union types are a very convenient way of avoiding these
situations by making the model data depend on the type, making impossible
states impossible.
Once the model is defined, let’s continue by implementing the view to represent the model:
-- assets/elm/src/View.elm

module View exposing (view)

import Dict exposing (Dict)
import Html exposing (Html, form)
import Html.Attributes as Html
import Html.Events as Html
import Messages exposing (Msg(..))
import Model exposing (..)


view : Model -> Html Msg
view { subscribeForm } =
    case subscribeForm of
        Success ->
            Html.div
                [ Html.class "success-message" ]
                [ Html.div
                    [ Html.class "icon is-large" ]
                    [ Html.i
                        [ Html.class "fa fa-3x fa-heart" ]
                        []
                    ]
                , Html.h2
                    []
                    [ Html.text "You have subscribed with success" ]
                , Html.p
                    []
                    [ Html.text "We will keep you updated with the latest news" ]
                ]

        _ ->
            formView subscribeForm


formView : SubscribeForm -> Html Msg
formView subscribeForm =
    let
        { fullName, email } =
            extractFormFields subscribeForm

        saving =
            case subscribeForm of
                Saving _ ->
                    True

                _ ->
                    False

        invalid =
            case subscribeForm of
                Invalid _ _ ->
                    True

                _ ->
                    False

        buttonDisabled =
            fullName == "" || email == "" || saving || invalid
    in
        Html.div
            [ Html.class "content" ]
            [ Html.h3
                []
                [ Html.text "Want to know more?" ]
            , Html.p
                []
                [ Html.text "Subscribe to stay updated" ]
            , formError subscribeForm
            , form
                [ Html.onSubmit HandleFormSubmit ]
                [ Html.div
                    [ Html.class "field" ]
                    [ Html.div
                        [ Html.class "control" ]
                        [ Html.input
                            [ Html.classList
                                [ ( "input is-medium", True )
                                ]
                            , Html.placeholder "My name is..."
                            , Html.required True
                            , Html.value fullName
                            , Html.onInput HandleFullNameInput
                            ]
                            []
                        ]
                    ]
                , Html.div
                    [ Html.class "field" ]
                    [ Html.div
                        [ Html.class "control" ]
                        [ Html.input
                            [ Html.classList
                                [ ( "input is-medium", True )
                                ]
                            , Html.type_ "email"
                            , Html.placeholder "My email address is..."
                            , Html.required True
                            , Html.value email
                            , Html.onInput HandleEmailInput
                            ]
                            []
                        ]
                    ]
                , Html.div
                    [ Html.class "field" ]
                    [ Html.div
                        [ Html.class "control" ]
                        [ Html.button
                            [ Html.class "button is-primary is-medium"
                            , Html.disabled buttonDisabled
                            ]
                            [ Html.span
                                [ Html.class "icon" ]
                                [ Html.i
                                    [ Html.classList
                                        [ ( "fa fa-check", not saving )
                                        , ( "fa fa-circle-o-notch fa-spin", saving )
                                        ]
                                    ]
                                    []
                                ]
                            , Html.span
                                []
                                [ Html.text "Subscribe me" ]
                            ]
                        ]
                    ]
                ]
            ]


formError : SubscribeForm -> Html Msg
formError subscribeForm =
    case subscribeForm of
        Errored _ message ->
            Html.div
                [ Html.class "notification is-danger fade-in" ]
                [ Html.text message ]

        _ ->
            Html.text ""
The view function receives the Model and depending on the value of
subscribeForm it renders a success message or the form using the
formView function. This function starts by extracting the
current formFields values and checking if the form is saving or invalid.
With these four values, we define the buttonDisabled value, to disable the
submit button if any of the fields are empty or the form is currently
invalid or saving the data. Inside the in block, it renders the form,
which has the following peculiarities which are worth mentioning:
-
It sends a
HandleFormSubmitmessage when submitted. -
It sends a
HandleFullNameInputmessage when thefullNameinput changes. -
Same happens for the
emailinput, but with aHandleEmailInputmessage. -
The submit button is styled and disabled depending on the current state
of
subscribeForm. -
The
formErrorfunction renders a message box with the error when the form state happens to beErrored.
We have not defined yet the messages that we are using in the view for handling input changes and the form submission, so let’s go ahead and create the messages module to define them:
-- assets/elm/src/Messages.elm

module Messages exposing (Msg(..))

import Dict exposing (Dict)
import Http


type Msg
    = HandleFullNameInput String
    | HandleEmailInput String
    | HandleFormSubmit
Next, let’s create the update module, which handles messages updating the application model:
-- assets/elm/src/Update.elm

module Update exposing (update)

import Messages exposing (Msg(..))
import Model exposing (..)


update : Msg -> Model -> ( Model, Cmd Msg )
update msg model =
    let
        subscribeForm =
            model.subscribeForm

        formFields =
            extractFormFields model.subscribeForm
    in
        case msg of
            HandleFullNameInput value ->
                { model | subscribeForm = Editing { formFields | fullName = value } } ! []

            HandleEmailInput value ->
                { model | subscribeForm = Editing { formFields | email = value } } ! []

            HandleFormSubmit ->
                { model | subscribeForm = Saving formFields } ! []
When the update function receives either a HandleFullNameInput or
a HandleEmailInput, it sets the subscribeForm to Editing applying the
current value of the corresponding input. This approach is going to be
very convenient while dealing with validation errors as we are going to
see in a minute. On the other hand, HandleFormSubmit sets the state to
Saving which we are using in the View module to add a spinner and disable
the submit button.
Last but not least, let’s change the main module to tie everything together:
-- assets/elm/src/Main.elm

module Main exposing (main)

import Html exposing (Html)
import Messages exposing (Msg(..))
import Model exposing (..)
import Update exposing (update)
import View exposing (view)


main : Program Never Model Msg
main =
    Html.program
        { init = init
        , view = view
        , update = update
        , subscriptions = subscriptions
        }


init : ( Model, Cmd Msg )
init =
    initialModel ! []


subscriptions : Model -> Sub Msg
subscriptions model =
    Sub.none
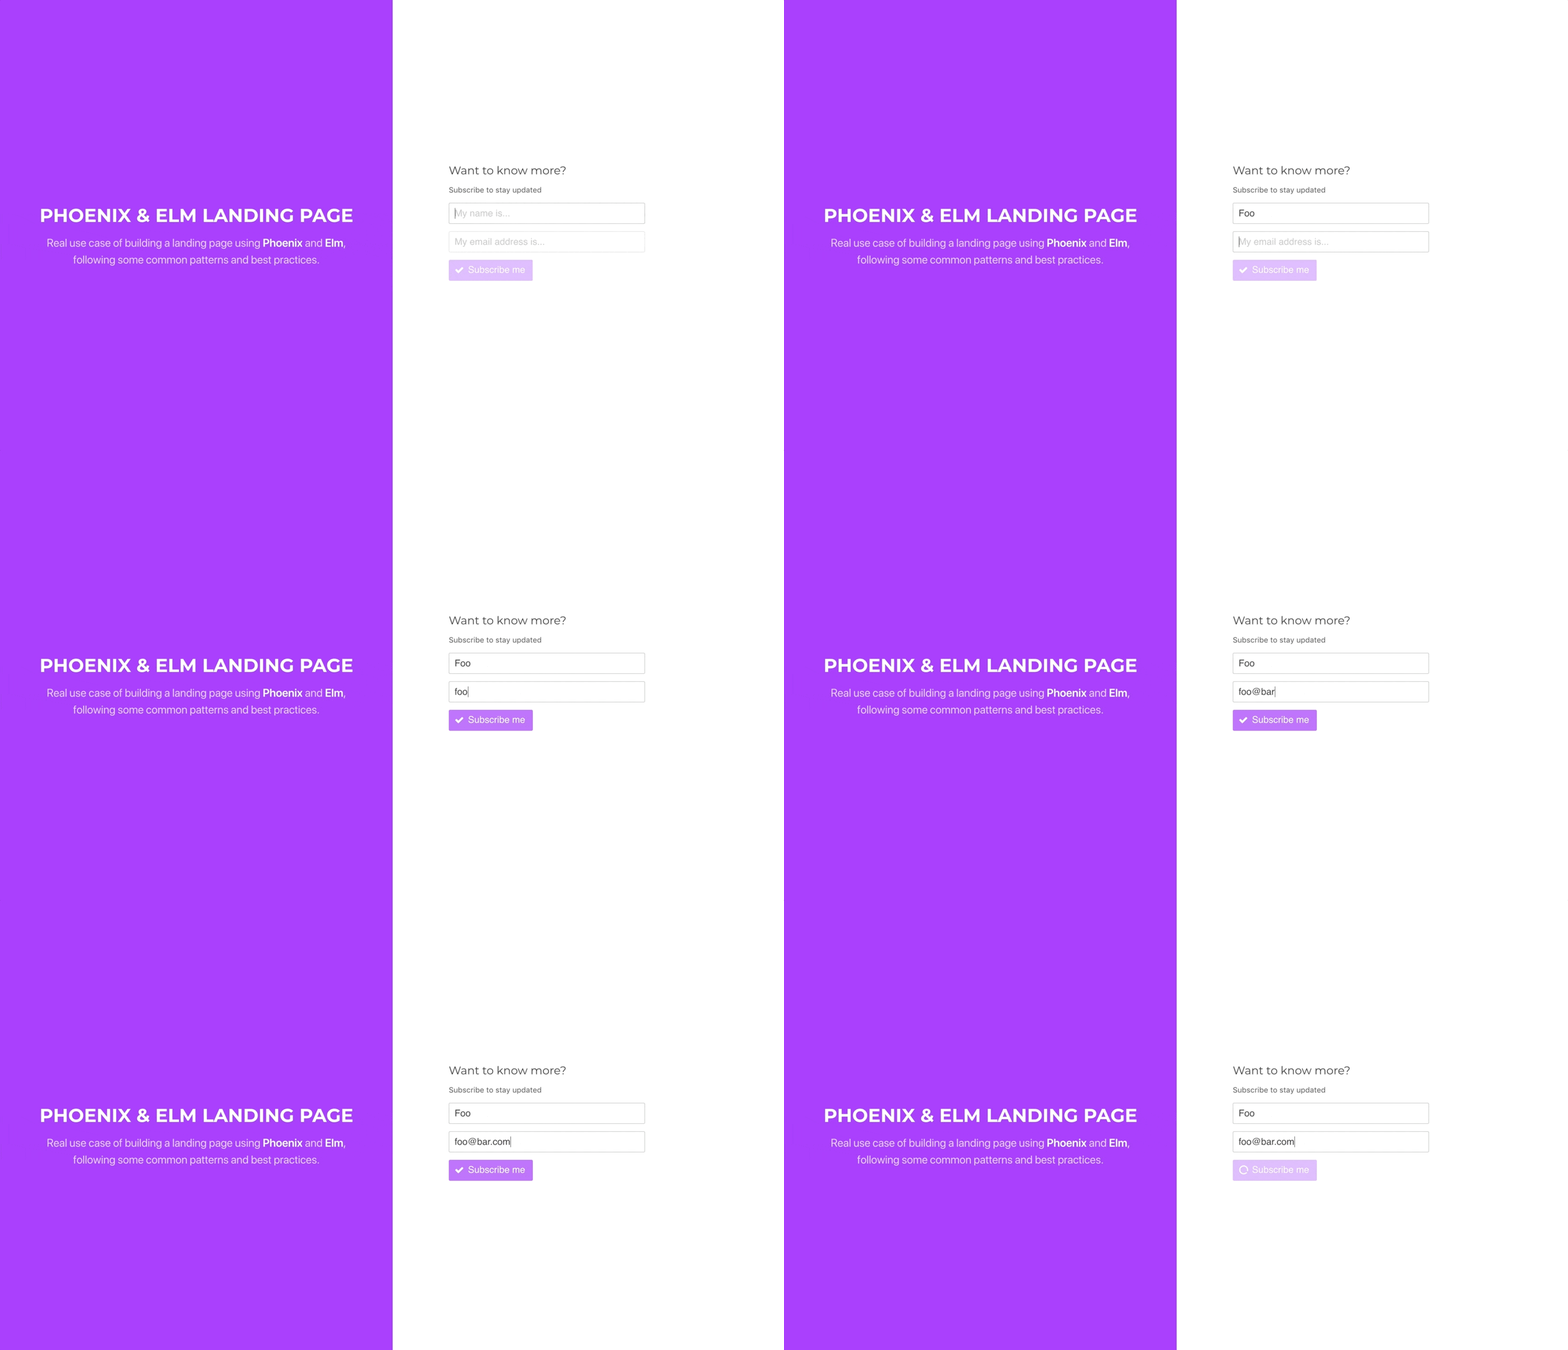
Everything should be compiling successfully now, so jumping back to the browser we should see the subscription form rendering and ready to send leads subscriptions:
Form submission and error handling
The form is submitted using an HTTP request, and for that, we need to install Elm’s HTTP package:
$ cd assets/elm
$ elm package install elm-lang/http -y
As an HTTP request involves side effects, we have to manage them in Elm
using Commands, so let’s create the command for posting the form:
-- assets/elm/src/Commands.elm

import Http
import Json.Decode as JD
import Json.Encode as JE
import Decoders exposing (responseDecoder)
import Messages exposing (Msg(..))
import Model exposing (SubscribeForm(..), FormFields)


subscribe : SubscribeForm -> Cmd Msg
subscribe subscribeForm =
    case subscribeForm of
        Saving formFields ->
            Http.send SubscribeResponse (post formFields)

        _ ->
            Cmd.none


post : FormFields -> Http.Request Bool
post formFields =
    Http.request
        { method = "POST"
        , headers = []
        , url = "/api/v1/leads"
        , body = Http.jsonBody (encodeModel formFields)
        , expect = Http.expectJson responseDecoder
        , timeout = Nothing
        , withCredentials = False
        }


encodeModel : FormFields -> JD.Value
encodeModel { fullName, email } =
    JE.object
        [ ( "lead"
          , JE.object
                [ ( "full_name", JE.string fullName )
                , ( "email", JE.string email )
                ]
          )
        ]
In the subscribe function we can find another example of how convenient
are union types. We want to post the data only when the form’s status is
Saving and not when there are validation errors for instance. Http.send
receives the SubscribeForm message, used to handle the result and the post
request. This request consists of a record that has all the details of the
request, including the JSON body which is the encoded form fields, and the
logic to handle the expected response in the expect field, in our case
a JSON decoder responseDecoder that we have to create:
-- assets/elm/src/Decoders.elm

module Decoders exposing (..)

import Json.Decode as Decode
import Model exposing (ValidationErrors)


responseDecoder : Decode.Decoder Bool
responseDecoder =
    Decode.succeed True
As we do not care about the payload that the LeadController is returning
once the lead subscribes successfully, the responseDecoder function
decodes anything received into a True value. Next step for handling the
response is to add the SubscribeResponse message to the Messages module:
-- assets/elm/src/Messages.elm

module Messages exposing (Msg(..))

import Dict exposing (Dict)
import Http


type Msg
    = HandleFullNameInput String
    | HandleEmailInput String
    | HandleFormSubmit
    | SubscribeResponse (Result Http.Error Bool)
And, of course, the necessary handle clause in the Update.update
function:
-- assets/elm/src/Update.elm

module Update exposing (update)

-- ...

update : Msg -> Model -> ( Model, Cmd Msg )
update msg model =
    let
        subscribeForm =
            model.subscribeForm

        formFields =
            extractFormFields model.subscribeForm
    in
        case msg of
            -- ...

            SubscribeResponse (Ok result) ->
                { model | subscribeForm = Success } ! []

            SubscribeResponse (Err (BadStatus response)) ->
                case Decode.decodeString validationErrorsDecoder response.body of
                    Ok validationErrors ->
                        { model | subscribeForm = Invalid formFields validationErrors } ! []

                    Err error ->
                        { model | subscribeForm = Errored formFields "Oops! Something went wrong!" } ! []

            SubscribeResponse (Err error) ->
                { model | subscribeForm = Errored formFields "Oops! Something went wrong!" } ! []
The Result of the form post can be either an Ok True, meaning that
everything went fine setting the subscribeForm to Success, or an
Http.Error, which is another union type describing the reason for the
error. In our case, we only want to handle validation errors, so it
patterns matches against BadStatus response, using the
validationErrorsDecoder to decode response which is the error list
returned by the LandingPageWeb.FallbackController that we created in the
previous part. If there is any other sort of error, it sets the form to
Errored with a custom error message. To make it work properly, let’s
implement the missing validationErrorsDecoder:
-- assets/elm/src/Decoders.elm

module Decoders exposing (..)

import Json.Decode as Decode
import Model exposing (ValidationErrors)

-- ...

validationErrorsDecoder : Decode.Decoder ValidationErrors
validationErrorsDecoder =
    Decode.dict <| Decode.list Decode.string
The new decoder transforms the response into a ValidationErrors which is
a Dict where its keys are field names, and the values are a list of
errors, that we can now render in the view:
-- assets/elm/src/View.elm

module View exposing (view)

-- ...

formView : SubscribeForm -> Html Msg
formView subscribeForm =
    let
        validationErrors =
            extractValidationErrors subscribeForm

        -- ...
    in
        -- ...

        , form
            [ Html.onSubmit HandleFormSubmit ]
            [ Html.div
                [ Html.class "field" ]
                [ Html.div
                    [ Html.class "control" ]
                    [ Html.input
                        [ Html.classList
                            [ ( "input is-medium", True )
                            , ( "is-danger", Dict.member "full_name" validationErrors )
                            ]
                        , Html.placeholder "My name is..."
                        , Html.required True
                        , Html.value fullName
                        , Html.onInput HandleFullNameInput
                        ]
                        []
                    , validationErrorView "full_name" validationErrors
                    ]
                ]
            , Html.div
                [ Html.class "field" ]
                [ Html.div
                    [ Html.class "control" ]
                    [ Html.input
                                [ Html.classList
                                    [ ( "input is-medium", True )
                                    , ( "is-danger", Dict.member "email" validationErrors )
                                    ]
                                , Html.type_ "email"
                                , Html.placeholder "My email address is..."
                                , Html.required True
                                , Html.value email
                                , Html.onInput HandleEmailInput
                                ]
                                []
                            , validationErrorView "email" validationErrors
                            ]
                      ]

                      -- ...


validationErrorView : String -> ValidationErrors -> Html Msg
validationErrorView key validationErrors =
    case Dict.get key validationErrors of
        Just error ->
            error
                |> List.map Html.text
                |> Html.p
                    [ Html.class "help is-danger" ]

        Nothing ->
            Html.text ""
Using the extractValidationErrors helper function from the Model module,
it gets the possible validationErrors and not only sets an is-danger class
to the fields when it happens to have errors but calls validationErrorView
to render them.
The final result
It is time to test out our work so far. Let’s jump back to the browser and try to subscribe using valid values:
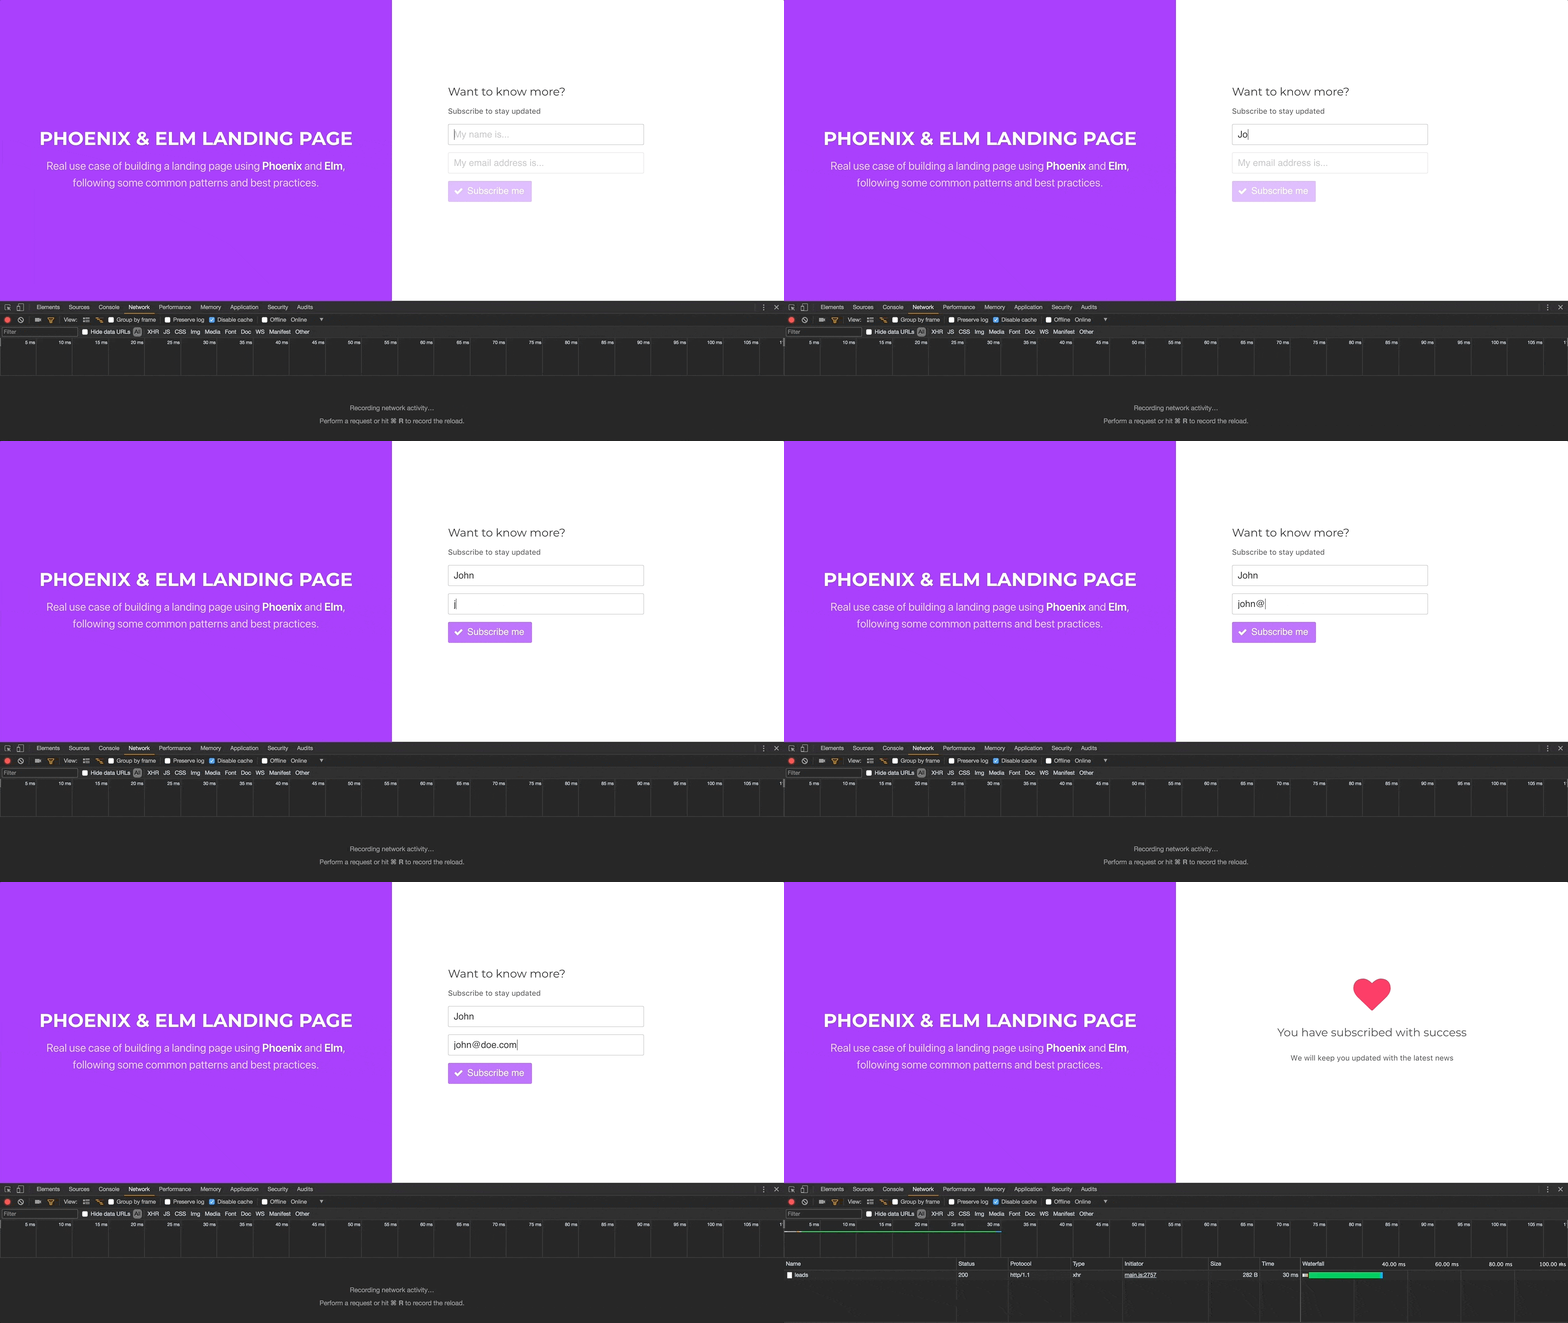
Submitting the form returns a 200 success message which changes the
subscribeForm to Success, displaying the success message. Next, let’s
try subscribing again using the same email:
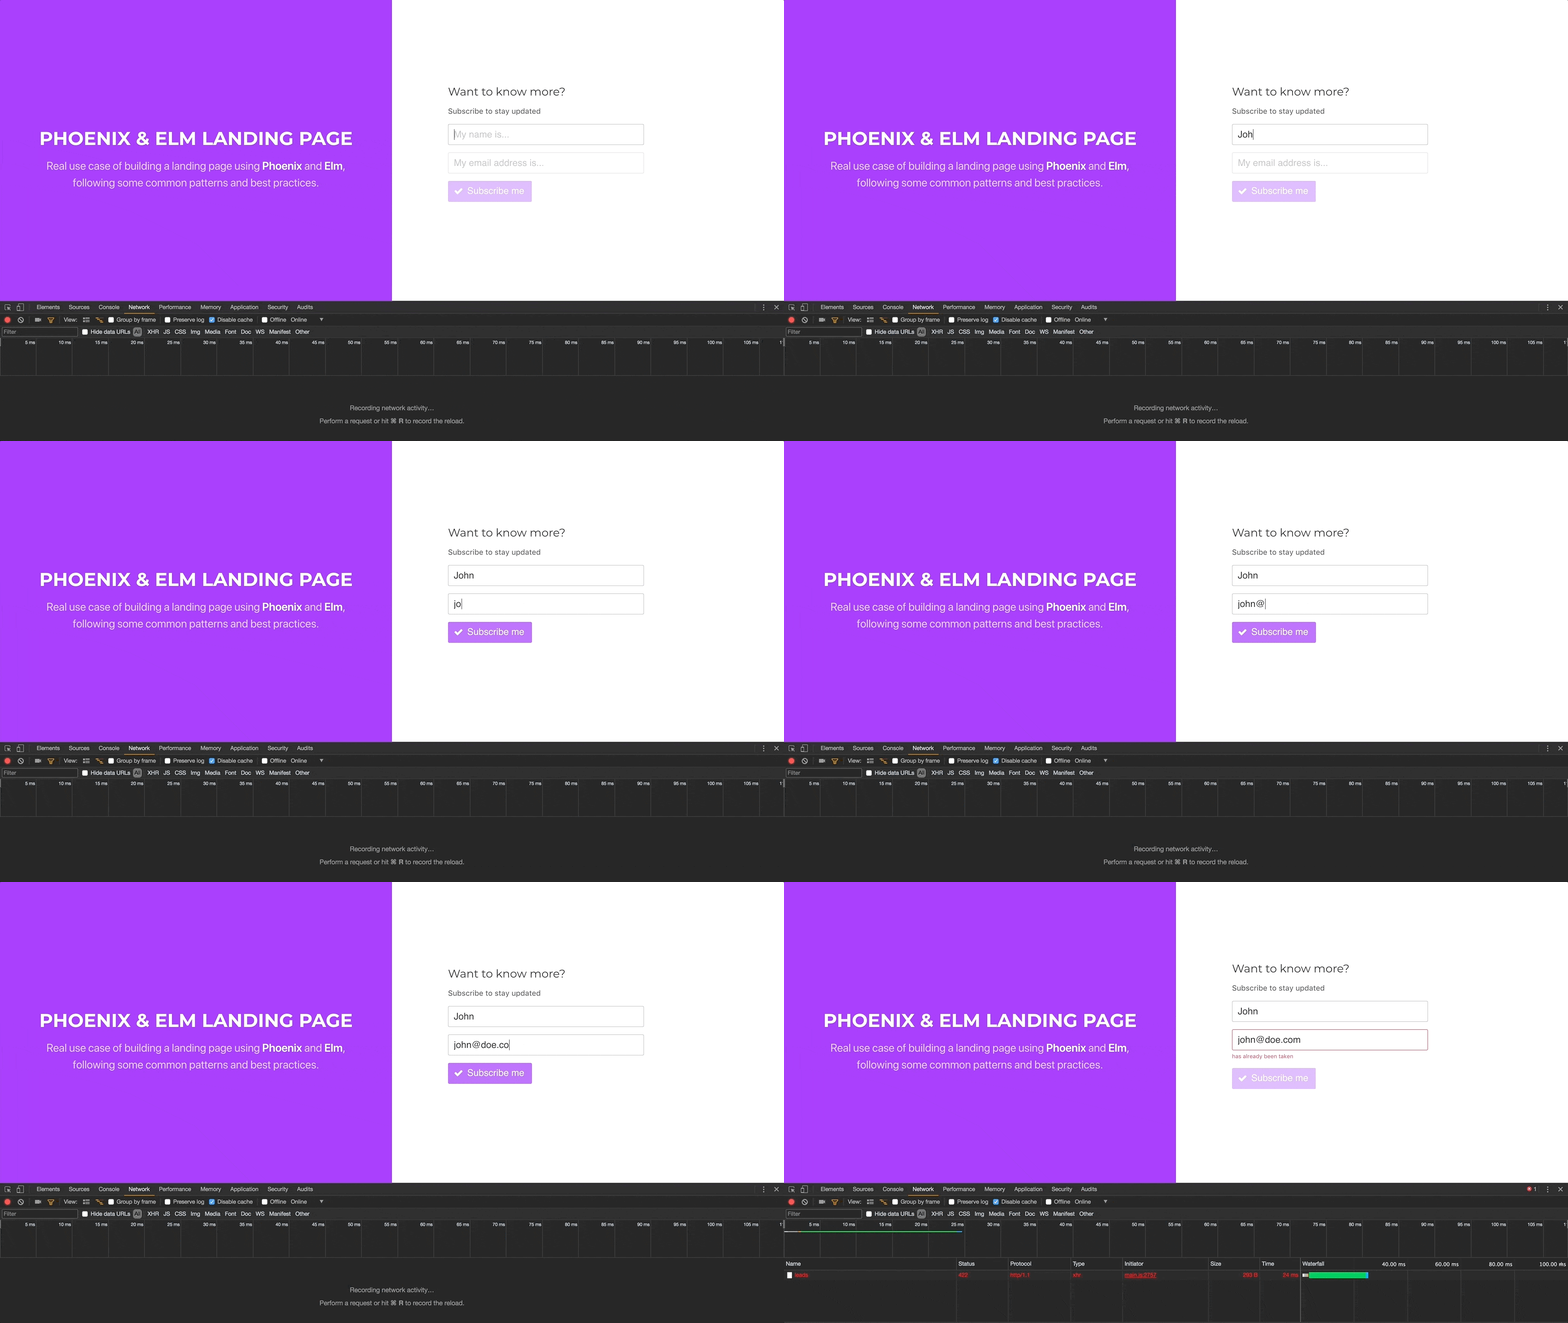
This time the server returns a 422 unprocessable entity status, with an
error message for the email field, as it is already taken, cool!
Finally, let’s try to stop the Phoenix server and submit the form once
more to simulate an unexpected response:
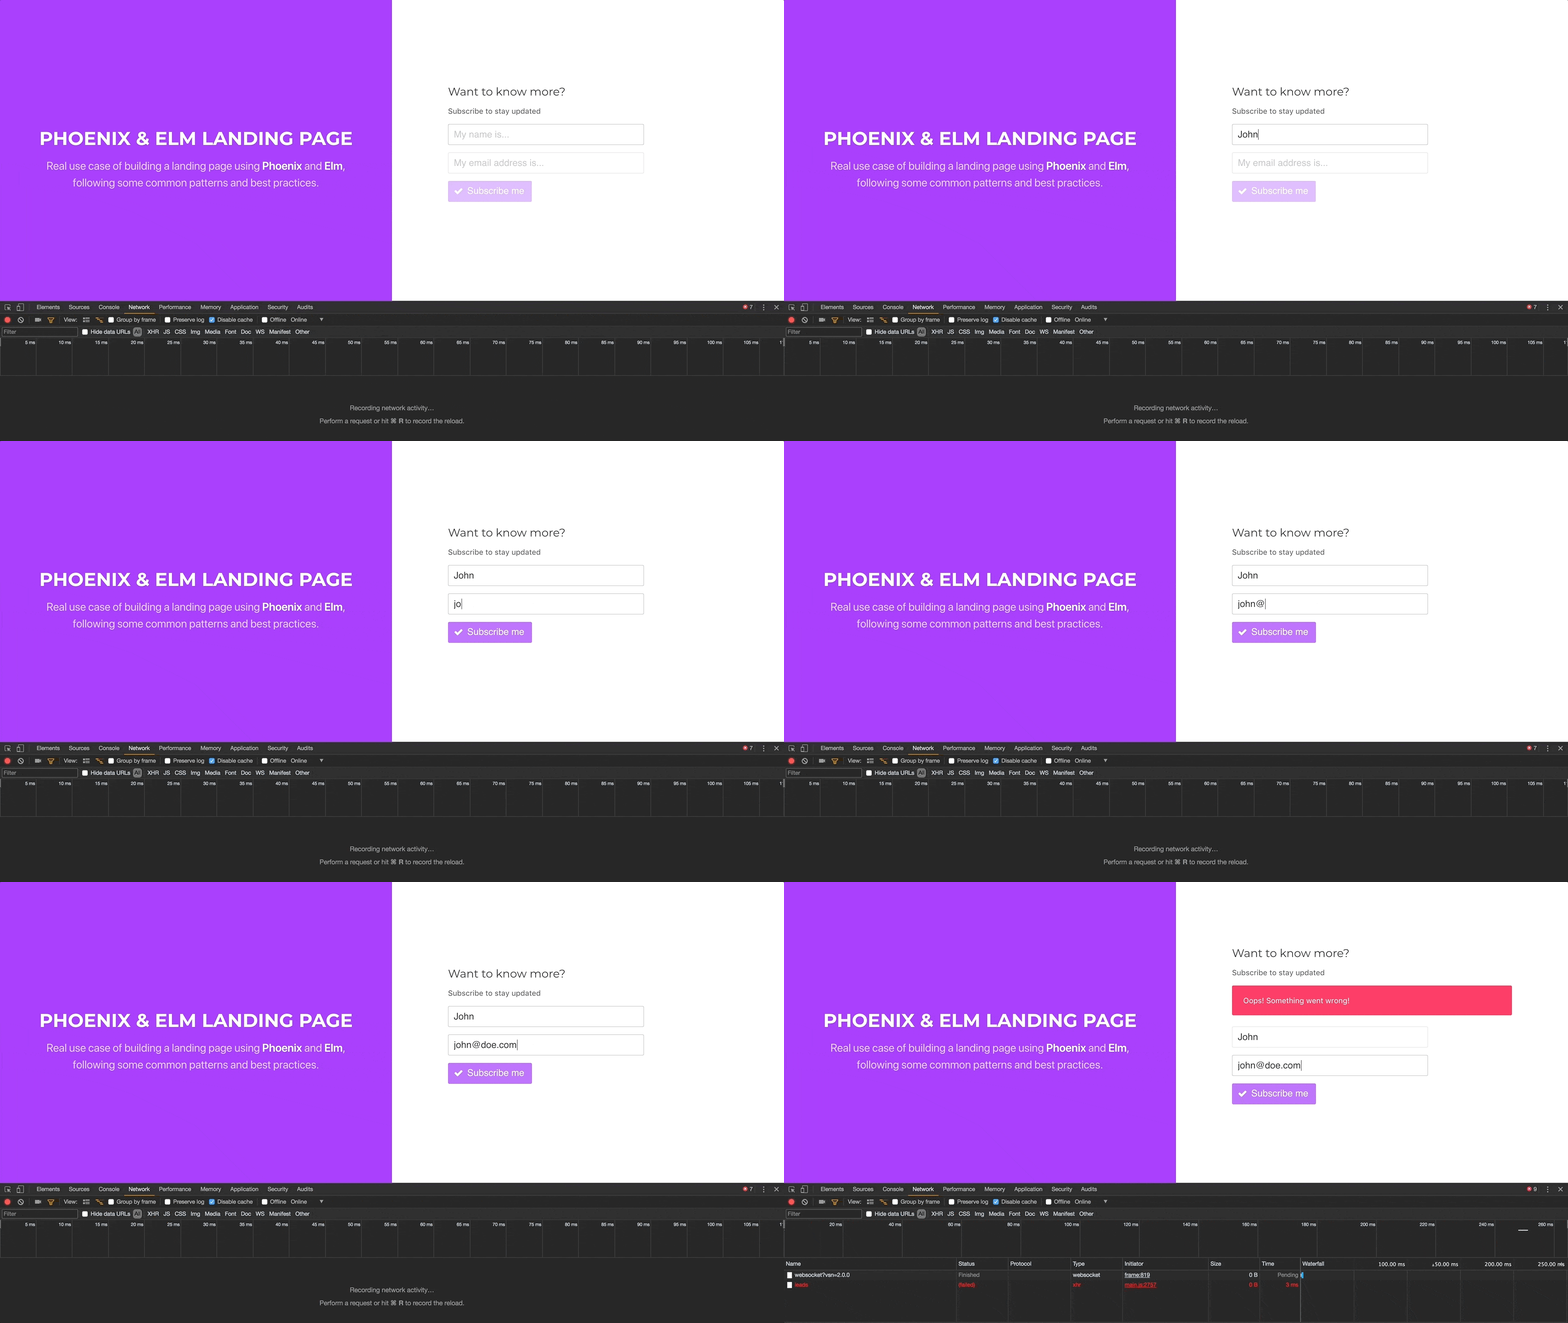
As the server is down, the request fails, rendering the generic error message that we have previously set for nonvalidation errors.
Our new landing page is looking pretty good so far, though we haven’t finished yet. In the next episode, we are going to add some protection against spam bots using Googles reCAPTCHA, which not only implies using an external javascript library from our Elm code but consuming a third party API from our backend. In the meantime, you can check out the source code of the part here.
Merry Christmas and Happy New Coding Year!
